Blog - biscuits and such
southern food blog
10088
paged,page-template,page-template-blog-large-image-whole-post,page-template-blog-large-image-whole-post-php,page,page-id-10088,paged-103,page-paged-103,ajax_fade,page_not_loaded,,select-child-theme-ver-1.0.0,select-theme-ver-2.8,wpb-js-composer js-comp-ver-4.3.5,vc_responsive
 

Mixed Berry Jam

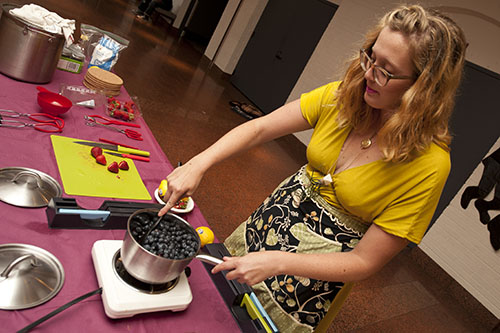
Last month when Sol Food was in town the Museum had a community day focused around food, sustainability, gardening, cooking, and living. In addition to the workshops Sol Food held on the bus and the vigorous butter making happening on the other end of the lobby, I held a jam-making workshop for anyone who was interested.

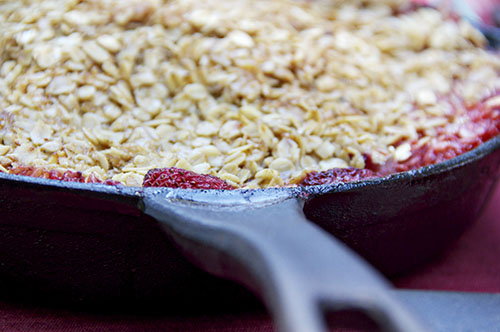
Berry jam, made without pectin or sugar added, is as simple as three ingredients, a bit of time, and patience. Whole blueberries combine with big chunks of strawberries and the juice of a few lemons, and simmer for a half an hour, or until they’re nice and syrupy. Then they quickly go into sanitized jars and get plopped into a water bath, ready to be enjoyed at your leisure.

I made enough jam that day for 6 1/2 pint jars- two went on with Sol Food and the rest went home with excited Museum guests. And there was just enough left over for a bit of sampling. Jam, it turns out, is the perfect compliment to homemade butter.

photos by Will Kirk

Mixed Berry Jam

1 1lb fresh strawberries

2 pints blueberries

4 lemons

1/2 or 1/4 pint canning jars

In a large, non-reactive pot combine whole blueberries and quartered strawberries over medium heat. Allow to simmer, stirring occasionally, until the juices are thick the the chunks of fruit have broken down. Stir in juice from lemons.

About an hour before you want to can fill two large pots with water.  I recommend that you have some canning equipment, at the very least a large pot with a rack and a pair of tongs.  You’ll need a separate pot for sterilizing your jars and lids.  Bring both pots of water to a boil.  In one pot (the one without a lid) place your jars and the lids (not the screw bands).  Allow them to boil for at least 10 minutes, but keep them in the pot until right before you fill them.

Use a spoon to fill the jars, leaving 1/4″ of room at the top.  Use a spoon to make sure there are no bubbles in the jar, and adjust the headspace (space between the jam and the top of the jar) as needed.  Wipe the rim with a sterile cloth and fish a lid out of the pot.  Place the lid onto the jar and screw the band on tightly.  Set aside and repeat with all of your jars.

Take the rack from the other pot and place the jars onto it.  Lower the rack into the pot (whose water should be boiling) and process the jars for 10 minutes.  Remove them from the water and (here’s the hardest part) wait for the ping.  When they first come out of the water the jar should pop up and down, but when the jars seals you won’t be able to pop the jar any more.  Some jars will seal immediately, some will take a little longer, and some may not at all.  If jars fail to seal, store them in the fridge for up to two weeks.  The jars that do seal, however, are good in a cool dark space for up to a year.  Enjoy!

Read More

Cast Iron Cobblers

The past few months I’ve been on a cobbler making spree. It started with a dinner party, then the 4th of July, then my birthday… it seemed like every few days I was filling up my skillets with fruit and oats. It’s the perfect thing about cobblers- one basic recipe can encompass so many colors and textures. Blueberries, strawberries, peaches, cherries, blackberries- all you need is a fresh fruit and a topping mixture and before you know it you have a simple, and delicious, dessert.

Cast Iron Cobbler

for a medium size cast iron pan

1 pint fresh fruit

Juice of 1/2 lemon

1 cup steel cut oats

1/2 cup brown sugar

1 stick butter

Dash of salt

1 tsp cinnamon

Clean and slice (for non-berries) fruit and pack evenly into skillet. Squeeze lemon juice over the fruit. Melt butter in a bowl. Mix butter, oats, sugar, salt, and cinnamon together and pack on top of the fruit.

Bake at 350 for 20-25 minutes. Or cook on a medium heat grill (over indirect heat) for 25 minutes.


Read More

Chocolate Raspberry Mini Pies

After almost four years of writing on this blog, posting weekly (mostly) original recipes, I often find myself in a rut. I find myself thinking about what to make, weighing the pros and cons, considering the feedback, and checking the archives to make sure I haven’t already posted it. I want to continue posting recipes that are original and delicious, and a lot of the time I hem and haw over what that means. But sometimes, I get an all-encompassing urge to make something and after I’ve acted on that craving I realize that hell, I can post this on the blog.

That happened this week. I was mulling over what to bring to a dinner party and before I knew it I was halfway to the store to buy raspberries and chocolate hazelnut spread. In the kitchen, instead of feeling burdened by the idea of making dough and laboring over hand pies I was excited. It’s not often in mid-July that I’m excited to turn my oven on in an unairconditioned apartment, but I couldn’t wait to see how these suckers would turn out.

They were delicious. I made two versions- half were hand pies that got cooked all together, the other were cup pies where the crust was baked but they were filled with fresh ingredients. Both were equally tasty and, thankfully, both satisfied my craving for chocolate hazelnut and raspberries. And despite the fact that I totally wiped out getting on the light rail, both were the perfect after-dinner treat for a rainy night party.

Raspberry & Chocolate Hazelnut Mini Pies

2 pints raspberries

Chocolate hazelnut spread

pie dough

2 1/2 cups all p flour

1/4 tsp salt

3 tbsp sugar

1/4 cup vegetable shortening, cold

1 1/2 stick cold butter

1/4-1 cup ice water

1 egg

whipped cream

1 pint of heavy whipping cream

1 tbsp chocolate hazelnut spread

2 tbsp sugar

Sift dry ingredients.  Add shortening and break it up with your hands as you start to coat the flour.  Add butter and work it in until it resembles coarse corn meal.  You should be able to pinch the dough together to form chunks.  Add the ice water, a little at a time, stirring in with a wooden spoon  Only add as much as it takes to make a ball.  Any more than that and you will be left with chewey crust.  However, make sure you’re using enough for your dough to hold together.  If you’re adding honey, now would be the time to whisk it into the water.  Be cautious with the amounts you chose, you don’t want it to get too sticky, I don’t recommend more than 3 tbsp.

Form a ball and divide it in half.  Cover each half with saran wrap and flatten into a disc shape.  Pop in the fridge for at least half an hour.

For the baked pies, preheat your oven to 350. Roll your dough out on a floured surface and cut into duplicates of the shape you’d like, at least 3″ in diameter. Fill one half of the dough with 1 tbsp of chocolate spread and 3-4 raspberries. Cover with the other half and crimp together the edges. Whisk together the egg and brush over top. Poke holes in the top of the pie. Repeat until you have the desired amount. Bake for 20 minutes, checking frequently.

For the fresh version, roll your dough out and press into a cupcake tin. Bake at 350 for 20-25 minutes, or until golden brown. Fill with 1 tbsp of chocolate spread and 5-7 raspberries. Whip together cream, spread, and sugar and top each pie with a few tablespoons of whipped cream. Enjoy!


Read More