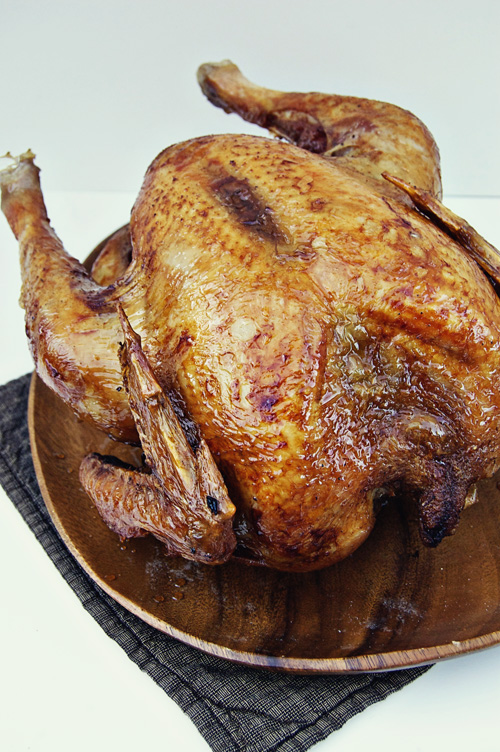

Sybil’s Brunswick Stew

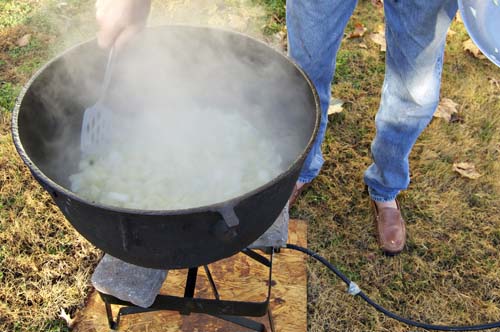
Sybil was my great-grandmother. This is her cauldron and her recipe for Brunswick Stew. On Friday, the day after Thanksgiving, we made brunswick stew in the backyard. It was an experience I’ve been looking forward to for a long time, and it was wonderful to get to share it with my family.

Brunswick stew, for those unfamiliar, is a traditional Southern dish, whose origins are disputed. As with all Southern dishes the stew itself ranges in ingredients depending on where you are. The fundamental stew includes tomatoes, lima beans, corn, and meat. Sybil preferred chicken and pork, though squirrel, rabbit, and beef can all be found in different variations. Not unlike many recipes developed by those with limited resources, Brunswick stew is very much a cook-what’s-available meal. The addition of potatoes, however, is apparently unique to North Carolina.

The day before we arrived in North Carolina my father started processing the meat in what he began calling the “real kitchen.” Also known as the garage. He cooked 6 chickens and two pork shoulders, and then he boiled the bones for a while to great a sturdy broth. According to my Great Uncle Everett (Sybil’s son), the broth is crucial.

The night before the stewing my brothers peeled twenty pounds of potatoes. The recipe begins with boiling the quartered potatoes in water until everything gets hot. This is the foundation of the stew. After about half an hour of boiling potatoes the chopped onions go in.

The day before my dad also began soaking the lima beans. This was the first time using dried beans in the stew, so it was an experiment. The beans and tomato sauce get added at the same time, which is when this finally starts looking like Brunswick stew (the tomato color is crucial).


The adding of the meat was, well, disturbing. My dad had stored the shredded meat in its broth for two days in the fridge in this 5 gallon bucket. It was (and I apologize for those with sensitive stomachs) meat jelly. And we added it in one jiggly scoop at a time. Not for the weak of heart.

After the meat was added, the tomatoes and corn started to go in, pretty slowly. The stew level reached critical heights so after each addition we waited a while for the stew to cook down. Then, more went in. This pattern went on for about two hours.

You may have noticed that the stew is being stirred with a hockey stick. After lamenting for days about what to use to stir the stew (we kept mentioning a stew oar), my dad had what he described as a “Pulp Fiction” moment in the garage, where he discovered the hockey stick a la Bruce Willis picking the samurai sword. While some of us were skeptical at first, after it was cleaned it served as the perfect stirring tool. Each of us had different stirring techniques, Dan likes a circular motion with the end of the stick while I prefer to paddle as though I’m Huckleberry Finn riding down a river of stew.

All in all the process took about three days, with about seven hours of cooking on Friday. After it cooked it sat and rested, and then we served some up for dinner that night (and put the rest in an epic amount of tupperware (about half of which is pictured below)). I thought it was excellent. My dad, however, was very disappointed because the beans never fully softened. In fact, his disappointment lead to my new favorite world view: “In life, you work really hard, but that doesn’t always matter. Sometimes you just get hard beans.” Preach it Paps.

Overall, this was exactly the memory I was hoping for. I love my family and learning traditions like this is really special to me. I can’t wait to make brunswick stew again- but not for a year or two.

Ed note: Looking for all the flavor of Sybil’s stew with a smaller time & cauldron commitment? Try our 8 hour Stovetop Brunswick Stew.
Brunswick Stew, Three Ways
My Uncle Everett sent two recipes from his mom, Sybil, which I’ve included. I also included my dad and his cousin Michael’s recipe that they created based off of their memories of brunswick stew. As Everett said, there are probably as many brunswick stew recipes as there are Southern mothers.
Sybil’s Stew #1, Makes 45 quarts:
1 1/2 lbs dried lima beans
2 quarts green lima beans
25 lbs potatoes
6 lbs onions
4 quarts of corn
4 gallons tomatoes
4 Five to 6 lb hens
20 lbs pork
(all stock)
Sybil’s Stew #2, Makes 40 quarts:
23 lbs pork (2 shoulders)
6 medium hens
25 lbs potatoes
5 lbs onions
2 lbs dried butter beans
2 quarts green butter beans
6 quarts corn
4 gal tomatoes
Everett’s memories: What I remember of the method was that everything was cooked in the previous broth. No seasonings were mentioned in either of mother’s recipes; I guess she salted as she went along. I remember that we would add Worcestershire sauce at the table but not in the cooking process.
Dad & Cousin Mike’s Stew:
24 lbs Roaster Chickens (4 six pounders)
5 lbs Beef Roast
10 lbs Pork Butt
12 lbs Corn (3 gallon size cans)
18 lbs Potatoes (4 gallon size cans)
12 lbs Lima Beans (3 gallon size cans)
7 large Onions
One Garlic bulb
120 oz Tomato Sauce (8 15oz cans)
18 lbs Whole tomatoes (4 gallon size cans)
1/8 cup Garlic Powder
12 oz Texas Pete
½ cup Black pepper
1/8 cup Chili powder
0ne cup Salt (too much..start off with 1/2 cup sea salt)
15oz Worcestershire Sauce
50 oz Merlot
The Making Of:
Day One– Boil quartered chickens (liver and gizzards included) in water that has about a cup of coarse salt in it. Boil until well done. Remove and let cool. Boil, in the same water, pork. Shred meat and set aside, then boil the bones in the water. Pour that broth over the meat and refrigerate.
Day Two– Peel potatoes and soak in water. Cover lima beans in water, soak.
Day Three – Quarter potatoes. Add them to the pot, over low heat with enough water to cover the potatoes. Chop the onions and add them in. Add lima beans. Continue to cook over medium heat, stirring often so that nothing sticks to the bottom. Add in tomato sauce.
Scoop the congealed fat off of the meat bucket (let’s save some Southern hearts, okay?) and add the meat (and its jellied broth) to the pot, stirring constantly. Bring to a boil. From there, add tomatoes and corn as there is room in the pot (make sure to drain them).
In the kitchen boil garlic in a small pot until soft. Smash the garlic and add that, and the water, to the stew.
Add in salt, pepper, hot sauce, and worcestershire sauce. Cook, stirring constantly, for about five more hours. Let rest 1 hour.
It’s important to taste as you go. We ended up with a stew that was well salted (undersalted to our Rosemond tongues but good for the normal person) and just a bit spicy. Allow people to doctor it to their own tastes with salt and hot sauce. When we reheated the first batch at home in our crock pot I added about a tablespoon of siracha and a sprinkle of sea salt. It was perfection (and after 8 hours in the crockpot my beans were perfect).