Blog - biscuits and such
southern food blog
10088
paged,page-template,page-template-blog-large-image-whole-post,page-template-blog-large-image-whole-post-php,page,page-id-10088,paged-197,page-paged-197,ajax_fade,page_not_loaded,,select-child-theme-ver-1.0.0,select-theme-ver-2.8,wpb-js-composer js-comp-ver-4.3.5,vc_responsive
 

Apple & Pear Pie

Now, as someone who was raised in “real” America and currently lives in “fake” America, my take on the American experience is well… very American.  Influences from my conservative parents to my left wing art school friends have shaped who I am, and the way that I eat and cook.  I’m just as likely to eat a Garden Roll at my favorite sushi place as I am to make grits, which I think makes me a very typical American.

ampie4

So, in the spirit of a bipartisan, holistic, and unified America, I’m offering you a new twist on an American favorite, the apple and pear pie.  This pie is originally based on something I saw on Food Network at some point.  I believe it was originally a Giada recipe.  Anyway, like most recipes, the first time you make them they belong to the creator.  By the fourth or fifth time, you’ve changed and adapted the recipe enough that it’s your own.

ampie6

This is a pretty malleable recipe, so I shop for and make this pie based on whims.  This week at the farmers market there was a wonderful display of apples and pears, so I picked two pears and three apples.  What makes this pie so tasty, I think, is the relationship between the pear and apple, as well as the spices.  I’ve posted a general pie crust recipe, which you can adapt for this pie by adding nutmeg, cinnamon, ginger, and honey into the crust.

ampie8

Really, the most important thing to keep in mind while making a pie is pacing.  Some elements, like how long the pie crust needs to sit in the fridge or how long the fruit needs to simmer, impact how you go about making the pie.  It’s also important to adjust the recipe for your circumstances.  This is the first time I’ve made a closed-top pie since I moved to our new apartment, and the top was brown within 45 minutes.  Which means that I’m going to need to readjust temperature and time to fit my apartment.

ampie7

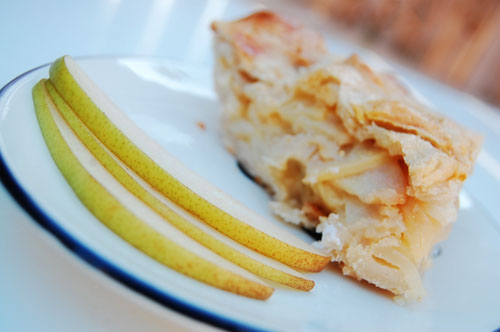
This pie is so perfectly balanced in texture, flavor, and weight, you’ll want to make it a staple in your American experience.  My suggestion?  Out with the old, in with the new!  With a government overhaul and the promise (hope, no matter how naive it may be) of change, let’s adapt to fit.

The New American Pie

1 lemon

3 apples

3 pears

2/3 cup sugar

1/2 tsp cinnamon

1/2 tsp ginger

1/4 tsp salt

Pinch of nutmeg

1/4 cup of butter

1/4 cup all p flour

1/2 tsp vanilla

1 egg

4 tbsp honey (2 for the filling and 2 for the topping)

Pie crust (find recipe here)

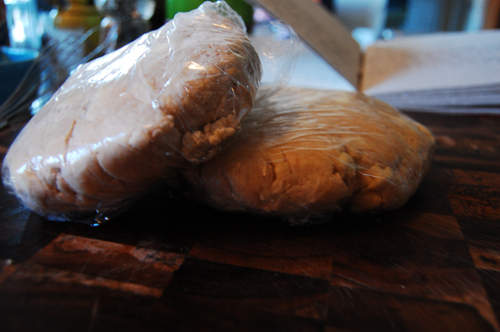
Start your pie crust, since it will need to sit in the fridge.  For this recipe, you want to add nutmeg, cinnamon, ginger, and honey to your crust.

Peel, core, and slice the fruit.  Your chunks should be 1/2 inch or smaller.  Squeeze lemon juice over the fruit, then toss in sugar, salt, and spices.  In a large skillet or deep dish, melt the butter.  You’re going to cook the fruit until it’s tender, so you want your temperature to be low to medium.  Add fruit and cook until juices simmer and fruit softens.  You don’t want the juices to evaporate out.  If they do, your pie will have a dry filling.  So, watch it closely.  When the fruit is tender, mix flour in.  Add vanilla and honey, and remove from heat.  Cool completely.

Roll out bottom crust and place in pie dish.  Pour in filling.  Roll out top crust and press on gently, pinching bottom and top together to create a seal.  Cut slits in the top.  Whisk together honey, egg, and sugar.  Brush onto the top.

Bake at 425* for 15 minutes, and then 50 minutes at 325*

Read More

Pie Dough

dough7


Pie dough can be a tricky thing to make.  You don’t want it to be too dense, you don’t want to let it get sticky or tacky or gummy.  You want it to be flaky and light, you want it to be able to stand alone but not to overpower the pie filling.  I know, this sounds terrifying.  It’s hard to convince yourself that you want to take it on.  But, I promise you, a pie crust from scratch (and the bragging rights that come with it) is totally worth it.  And this is a recipe that is easier that you’d expect, and has turned out brilliantly for me.


dough9


I do have a few tips for you.  I’ve found that when I eat pie, I often don’t eat parts of the crust because they’re flavorless.  So my solution was to start baking spices and flavor enhancers into the pie crust.  Each pie you make is bound to have a spice profile that can be added to the crust to give it a little pizzaz.   For instance, if I’m making a pumpkin pie, I’ll bake some cinnamon and nutmeg into the crust.  For a bourbon peach pie, I’d bake honey and brown sugar into the crust.


dough3


Another thing to keep in mind while making a pie crust is that the refrigerator is your friend.  The colder your ingredients, the easier the time will be.  If your dough starts getting tacky and hard to roll or form, just pop it back in the fridge for a bit.  It’ll make your life so much easier.  Also, if you’re having trouble with your dough sticking to your rolling pin or your counter, try rolling it out between two pieces of floured wax paper.  This can really save you a headache.  Finally, this recipe makes enough for a top and bottom crust.  If you only need a bottom, you can freeze the remaining dough for up to a month.  When you’re ready to use it, I suggest you take it out of the freezer and let it thaw completely in the fridge.  Other than that, just stay positive.  In a world where homemade often means bought from the store and cooked at home, a scratch pie is deeply satisfying.


dough8


Pie Dough


2 1/2 cups all p flour

1/4 tsp salt

3 tbsp sugar

1/4 cup vegetable shortening, cold

1 1/2 stick cold butter

1/4-1 cup ice water

Spices/flavor enhancers


Sift dry ingredients.  Add shortening and break it up with your hands as you start to coat the flour.  Add butter and work it in until it resembles coarse corn meal.  You should be able to pinch the dough together to form chunks.  Add the ice water, a little at a time, stirring in with a wooden spoon  Only add as much as it takes to make a ball.  Any more than that and you will be left with chewey crust.  However, make sure you’re using enough for your dough to hold together.  If you’re adding honey, now would be the time to whisk it into the water.  Be cautious with the amounts you chose, you don’t want it to get too sticky, I don’t recommend more than 3 tbsp.


Form a ball and divide it in half.  Cover each half with saran wrap and flatten into a disc shape.  Pop in the fridge for at least half an hour.  Take half the dough out of the fridge, and roll it out on a lightly floured surface.  It also helps to cover your rolling pin with flour.  Fit the dough into your pie dish, and roll out the remaining dough.


If you’re making a traditional, close top pie, lay the rolled out dough on top of the filled pie, and pinch the top and bottom crusts together.  You can then go back in with a fork and crimp the edges.  Don’t forget to cut slits in the top so the pie can let out some steam.


If you’re making a lattice top pie, use a knife or pie cutter to cut strips.  Weave them together, and sprinkle with sugar.

Read More

Fried Chicken

friedchicken1

To me, fried chicken has always been synonymous with boating.  For reasons I can’t explain, fried chicken is the perfect boat/beach food.  That and cookies (my favorite corny stepmom moment was when she pulled out a package of cookies and said “Chips A’hoy, get it?”  It was perfect).

friedchicken7

Anyway, everytime we went to the beach or out on the boat, fried chicken from Bojangles or somewhere else came with us.  And it always made me so happy.  Something about the salty chicken washed down with cold soda and spray from the ocean epitomized summer for me.

friedchicken6

As for making it on my own, that’s a different story.  I’ve watched other people make it, and I myself have made lightly breaded, lightly fried chicken, but never what most people would consider authentic fried chicken.  So, this was an adventure.

friedchicken5

I based my recipe on Paula Deen‘s recipe, which she credits to her Grandma Paul.  Now, I know people who say they don’t like Paula Deen.  Granted, most of them are from above the Mason-Dixon line.  But I adore this woman.  My friend Chris and I read her autobiography It Ain’t All About the Cookin’ last summer and I was sold.  I can’t say that I feel compelled to experiment with her non-southern dishes, I absolutely adore her when she sticks to her agoraphobic, comfort food roots.

friedchicken2

As for the merits of this particular PD recipe.  It was an easy, to the point recipe to follow.  When I’m making a new food, I like to vet the recipe by comparing it with other similar recipes, just to make sure the author isn’t way off base about something.  Paula Deen was way off base with this recipe’s cook time.  She suggested 10 minutes fry time for white meat, 14 for dark.  I chose to fry just drumsticks, my favorite part, which is considered dark meat.  Everywhere else I looked suggested 10 plus minutes per side, so I ended up frying them for about 25 minutes.  I also double dipped the chicken, mostly because my favorite part of fried chicken is the fried part, and it’s so much crispier if it’s double dipped.

friedchicken3

I had five drumsticks, so I fried them in two batches.  I tried two different methods of frying, in order to test the merits of each.  With the first batch, I flipped them every two minutes.  The second batch I fried for 8 minutes on each side, plus a few minutes on a one minute rotation to even out the cooking.  I found that the first method produced a much more evenly cooked piece of chicken, so I recommend that.

friedchicken31

Other than that, expect to get oil all over your stove top.  Expect to get popped a few times.  And expect delicious flavor.

Fried Chicken

adapted from Paula Deen

2 eggs

1/3 cup water

2 cups all purpose flour

1 tsp ground pepper

1/2 tsp red pepper flakes

5 drumsticks (or the amount of chicken of your choice)

Peanut oil for frying

Salt, pepper, and red pepper for seasoning

According to Paula’s grandmother, your chicken should stand, seasoned, in the refrigerator for at least two  hours.  So begin by seasoning your chicken and putting it in the fridge to hang.  When it’s time for cookin’, go ahead and pour your oil into a cast iron pan.  The ideal temperature for your oil is 350*.  I have a twelve inch cast iron pan, and I poured 32 ounces of peanut oil into it.  Your oil should be about an inch deep, so depending on the size of your pan, the amount of oil will vary.

Whisk the eggs with the water.  Mix the pepper, the red pepper, and the flour together, and place in a shallow bowl.  The best way to bread your chicken is a factory line setting.  I had the plate with the chicken, the egg mixture, the flour, and a plate waiting at the end.  When it was time to double dip, I rinsed off the first plate and switched them.  So, dip your chicken in the egg, dip them in the flour, and repeat.

Once your oil is the right temperature, gently place the chicken in with tongs.  Gently mostly so you don’t make such a mess of your floor and stove.  Set your timer for twenty minutes, and flip the chicken every two minutes.  The chicken should get very crispy and should appear a little more brown everytime you flip it.  If at twenty minutes it hasn’t reached that golden brown color that chicken should be, keep going, flipping every one minute.

Gently remove from oil, let cool slightly, and serve.

Serves 2-5.

*A note on what to do with your oil.  I’ve spent enough time watching my father fry things in peanut oil and cook in cast iron pans to know that there are some things that get better with age and use.  Both your pan and your oil will gain flavor and seasoning from this experience.  So if you’re going to fry again, keep your oil.  If you’re not, put your oil back into it’s container and throw it away, or try and find an oil recycling program in your area.  If you pour it down your sink the only person you’ll be hurting is yourself… the plumbing bill will outweigh any time saved by dumping it.

Read More