Blog - biscuits and such
southern food blog
10088
paged,page-template,page-template-blog-large-image-whole-post,page-template-blog-large-image-whole-post-php,page,page-id-10088,paged-114,page-paged-114,ajax_fade,page_not_loaded,,select-child-theme-ver-1.0.0,select-theme-ver-2.8,wpb-js-composer js-comp-ver-4.3.5,vc_responsive
 

The Cast Iron Chronicles: Part 5

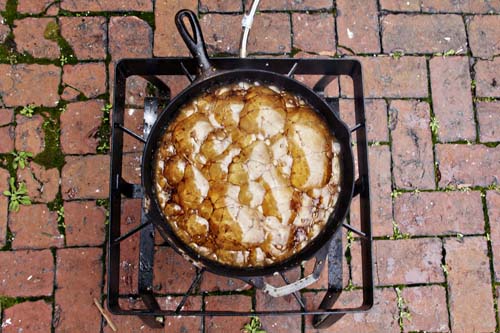
Okay, so after our last super exciting installment I’m back with another boring me-sanding-in-my-living-room-watching-Criminal Minds post. After setting the pan on fire (on purpose), I had two things left to accomplish- I needed to make sure the last of the rust/carbon residue was scrubbed out, and I needed to clean the rust off the bottom of the pan (an area I’d mostly been ignoring). So I sat down with my sanding paper (coarse first, then fine) and set to work.

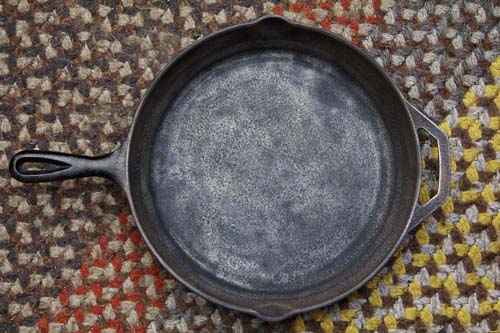
After about an hour of admiring Dr. Spencer Reed’s new haircut (circa Season 4), the pan was looking pretty incredible.  By this point all of the visible rust was gone and it looked like a raw but useable piece of cast iron equipment. It took me a few minutes to accept it, seeing as how I’ve been cracking at this beast for weeks I didn’t think I’d ever get to the point where I’d be ready to fry an egg in it.

And fry an egg I will, after a few additional steps. I rinsed out what had been sanded off and took to the pan with very hot water and a lot of soap. I know I always preach that soap and your cast iron are mortal enemies, and that is VERY TRUE, with one exception. Right before you reseason a pan a gentle soap can be a great help in ensuring that your pan is ready to use with food. I took a good long crack at the pan in the sink, scrubbing it until the cloth wiped clean.  The next step is to season it gently, which will be our next (and final) installment. And then the bacon, naturally.

Part 1 / Part 2 / Part 3 / Part 4


p.s., It’s weird that I didn’t get a lecture from anyone about using the wrong amount of oil in the last post. I get nasty emails about so much less (coughgrammarcough). You guys have gotten soft.

p.p.s. That wasn’t an invitation to send me a lecture, thankskbye.

Read More

Mojito Pie

Here’s my problem with National Pie Month falling during the month of February- there isn’t any good fruit in season. National Pie Month should fall during a month when EVERYTHING is in season and ready to be pied. September, perhaps.  Any month when what is seasonally appropriate includes more than storage apples and nuts.  A month celebrating pie should allow for BERRIES and STONE FRUIT and everything that is FRESH. Not a month where in most of the nation is in deep frost.  It’s just silly.

Early in the week I was thinking that I would make a winter banana pudding. I thought, I haven’t made that one yet, it’ll be a good one for pie month.  Until I remembered that I have made a winter banana pudding for the blog and it was perfect for pie month. Last year. And then I thought about all the pies I made last year and all the pies I could possibly make and then I felt hopeless because they are only so many mousses and chesses and fruit-less pies out there.  I fell into a pit of despair… until the mail came.

Sometime last year Epicurean Charlotte asked if they could use my Chocolate Chess pie and story in their magazine.  I gave them permission and then totally forgot about it, until a friend from Durham saw a copy and offered to mail it to me.  When it came in the mail yesterday I was so excited.  I pored over the two page spread until it finally struck me that they hadn’t used my photo of chocolate chess pie.  In fact, they hadn’t used a photo of chocolate chess at all.  It was a traditional white chess (vanilla/vinegar/lemon/lime/something).  And then I started thinking about lime chess.  And then I decided to make a lime chess pie with a rum crust and mint whipped cream- a mojito pie.

As it turns out, mojito pie is pretty delicious. It’s tangy and fresh, not unlike it’s cocktail namesake.  It’s not quite the blueberry peach pie I’m craving, but for February it’s pretty damn good.  And don’t worry, there’s plenty of time for fruit pies later this summer.

Mojito Pie

pie dough

2 1/4 cups flour

2 tbsp sugar

1 tsp salt

1/4 cup vegetable shortening

1 1/2 sticks butter

1/2 cup cold rum

Ice cold water

chess

5 eggs

1 cup sugar

1/2 cup brown sugar

juice of 5 limes

1 tsp vanilla

2 tbsp flour

1/2 cup butter, melted

whipped cream

1 cup heavy whipping cream

Fresh mint

Spearmint extract

Begin by making your pie dough.  Mix together dry ingredients.  Using your hands, work in the shortening.  Cube the butter and cut that in, until the dough has the consistency of cornmeal. Pour in the rum.  Stir.  Add ice water, as needed, until the dough clings. Wrap and refrigerate for at least 1 hour.

To make the chess combine your dry ingredients.  Using an electric mixer, beat them together.  Add the eggs, one at a time.  Add the butter, melted.  Add in vanilla and lime juice.

Heat your oven to 325. Roll out your pie dough and press into pie dish.  Pour filling into the dish.  Bake for 45 minutes or until the pie is brown and mostly set.  If the center is still a bit wobbly, that’s fine.  Let cool.

While your pie is cooling, mash up the mint and soak it in the cream.  If, after 45 minutes or so, the cream is not as minty as you’d like, add a bit of extract.  A VERY small amount. You want the flavor to be subtle.  Remove the mint leaves and whip the cream until it holds stiff peaks.  Spread over pie top and refrigerate for 1 hour before serving.

Read More

The Cast Iron Chronicles: Part 4

Okay, so I’m going to start this post with two statements.  The first is aimed both at my parents and my landlord- I promise that when we did this portion of the restoration we had a fire extinguisher on hand and that the pan was not close to anything that could catch on fire.  The second is aimed at my father and everyone who knows better than me- I know I used too much oil.  I mean, I didn’t know that at the time, but have since realized that I did not need to use that much oil.  Thankfully Dan is an Eagle Scout so all the necessary precautions were taken.

Now for the light-on-fire installment of our series. As you’ll recall from part 3, the next step was to coat it with oil and “burn the bejesus” out of the pan.  So on Saturday we hauled out our large burner, threw some oil in the pan, and sat around until it caught on fire (extinguisher in hand).  The Capt’n’s advice was to only put the fire out “when it got a little crazy,” so I was expecting for this to get interesting.

We added a 1/4″ of oil to the pan, which I take it is too much.  The Lodge website suggested “a thin layer” and my dad (later) told me to put oil in the pan, spread it around, and then dump the excess oil out.  Somewhere in the middle is probably best.  From what I gather after reading about the process is that by bringing oil past its burning point in an iron pan you release free radicals that help to restore the iron.  Something about polymerization. Remind me to ask my chemist father-in-law about it the next time we see him.  I don’t totally know why it works, but I do know people have been doing it for centuries, and that’s good enough for me.  The internet is also full of arguments about what kind of oil to use, vegetable oil versus lard, etc.  I’m not going to get into that because I really can’t speak to what is best. I used canola oil and it worked just fine.

As the oil heated up Dan’s comfort level shifted from “this is really cool” to “this is making me nervous” quickly.  As soon as it started smoking a lot we cut the heat, and at that exact moment it burst into flames.  Following my dad’s advice I used baking soda to extinguish the flames, which worked like a charm.  The flames when out and then the oil-carbon-rust-baking soda combination formed these really gross/awesome bubbles.  Once it had cooled down I brought it inside and scooped out this gunk that was completely fascinating and disgusting.

After I got all the excess oil residue out I used a combination of steel wool and hot water to really scrub at the pan until it was rubbing clean and totally rinsed out.  This took approximately fifteen minutes.  After drying it off it looked like a brand new pan, it was amazing.

Even though it’s looking worlds better than it was a few weeks ago, I’m going to do one more round of sanding to really make sure I get the last of the carbon and rust out.  Then there will be two more steps- a gentle oven seasoning and its bacon christening.  I am so impressed by how (relatively) easy this whole process has been.  Time consuming, yes, but since I’ve been working slowly it’s been so much fun.  I can’t wait to pick up more cast iron to work on!

Part 1/ Part 2/ Part 3

Read More