
Starting a post about one of my favorite foods has left me here, sipping my coffee, for almost an hour. Where do I begin? Do I tell you my childhood memories associated with Eastern North Carolina Pulled Pork Barbeque (the only way to eat it, in my opinion)? Do I talk about pig pickin’s at church gatherings, family functions, neighborhood parties? Or do I start in the present and talk about how on Saturday I smoked my first pig shoulder, pulled it by hand, and the end result was some of the most delicious barbeque I’ve ever eaten? How about I cover all of this, starting with a definition of barbeque and what it means to make it Eastern North Carolina style?

(image via)
First off, this is the pig. If you’re squemish about the fact that your meat comes from animals, now is the time to defect. And maybe have a reality check because that kind of thinking is disrespectful to the animal that you’re enjoying for dinner. There are a lot of different types of dishes that come from each cut of the pig, and I’ll just give you a general run down, starting with ham. Ham is the hind quarters of the pig and I have to say, my least favorite cut. Maybe it was an over-saturation of ham dinners for special occasions, or the dreaded ham lunchmeat, but I just don’t like ham. It doesn’t do it for me, and I can’t get myself to like it. But I’m okay with that because there is plenty left for me on the pig. The back and middle cut contain your ribs, sausage meat, intestines, and odds and ends. The belly, which is a very fashionable part of the pig these days, is delicious smoked, cured, etc, and is also the source of the All-American favorite, bacon. Next up is the best part of the pig, the shoulder. Commonly referred to as the “butt” or “Boston butt,” the shoulder is the most commonly used cut of the pig for barbeque (when you’re not cooking the whole pig). It is a tough cut, which requires that it be cooked over low heat for a long time. This low and slow method is what creates the tender, mouth watering, delicious flavor and texture of barbeque. But we’ll get to that. The last cut of the pig is the head, which (believe it or not) is commonly used in stocks, soups, and sometimes even gelatin molds (called head cheese).


So that’s the pig. Now here’s a little history of my favorite part, barbeque. It is worth mentioning, up front, that when I say “barbeque” I mean something very, very specific. I mean pork that has been cooked slowly over low heat/smoke, and basted in a vinegar based sauce. This is the traditional North Carolina way and around the south you’ll find variations on the kind of sauce but the constant is that “barbeque” is always a noun. If you go south of, say, Richmond, and expect to get a hamburger when someone invites you over for barbeque, you’ll be mistaken. For a full run down of the types of barbeque the south has created, see here. Now, while every state is entitled to sauce its pig however it wants, it is worth noting that the style I’m showing you today, pork slow roasted and basted in a sauce that is made up completely of vinegar, red pepper, salt, and black pepper, is the original American barbeque. Starting in the coastal colonies, this is how the first pigs were roasted and prepared in what is now the U.S. And while Eastern North Carolina (roughly parts of the Piedmont and all points East) is the only area that still eats its barbeque this way, it has its roots throughout what was coastal colonial America.

In the south barbequing is an important part of almost all facets of the culture. From church picnics to swim team meets, the presence of a whole pig roasting all day was an important and expected part of my life. Cooking a whole pig, or even just smoking a portion of one, is an all day experience, and participating in this experience as a community is amazing. Last year my Father’s Father’s side of the family, the Rosemonds, had a reunion. We had a pig pickin’ and the whole day was spent milling around, watching the pork cook, being together. It’s an excuse to sit around all day and enjoy the people around you. There is something so liberating about not being able to do anything else or go anywhere because you have to make sure the coals stay hot, you have to baste the meat every half an hour. And in a society where everything is expected to be instantaneous, where your boneless, skinless chicken breast needs to be finished cooking in under ten minutes so that you can go on to more important things, it is really nice to cook something that you can’t hurry. That won’t be done until it’s good and ready. There’s no rushing a smoking pig.


Despite having been present at countless pig pickin’s and barbeques, Saturday was the first day that I made barbeque myself. Not equipped to cook a whole pig in my small urban backyard, we opted to cook a shoulder on our smoker. Now the smoker is a special piece of equipment that made it a little easier but is not necessary and the instructions I will give are for cooking a pork shoulder on a regular charcoal grill. I got off to a late start on Saturday and by the time I had gone to pick up the shoulder (a respectable 6.5 pounds), gotten the coals hot, and prepped the meat, it was 11 a.m. The shoulder was over the coals by 11.30, and the fun began. The whole day was spent with me sitting outside, reading, keeping a second set of coals hot (ready to transfer into the smoker), basting the meat, and tantalizing the neighborhood with the sweet smell of hickory. Many pages read and a few beers later the meat came off the grill at about 8. It rested for an hour and then I pulled it, sauced it, and served it around 9.30. And then we ate and fell into a state of total bliss.
 Dan checking on the coals. Obviously, I need to invest in manlier oven mitts.
There are a few must-dos when it comes to making barbeque. For one, charcoal is a necessity. A lot of the flavor of great barbeque is the smoke taste, specifically the hickory smoke taste. It adds an element that can’t be recreated by sauces and an electric grill. If you’re going to go to the trouble of making barbeque, do it right (it’ll be worth it). The second is that the temperature needs to be very carefully maintained, which is why you really have to hang out next to the grill for the duration. I can’t over-emphasize how important the “low and slow” mantra is. To start you’ll get a good little collection of hot charcoals and hickory chunks going, and then every half an hour from then on you’ll need to add 5 or 6 more hot coals, which means having a second pile of charcoal going. Finally, the meat needs to be juicy. I’m no fan of dry meat and there are two things you’ll do to prevent that. The first is that for the first 5 hours or so, you’ll cook it with the meat side down, the fat on top. This will allow the fat to drip down through the meat, keeping it tender. Second, every time you add more charcoals you’ll baste. Combined with a good saucing after you’ve pulled the pork, you’ll have juicy, mouth watering meat.

I’m not one to toot my own horn when I don’t deserve it so when I say this is among the best barbeque I’ve ever had, I’m saying that as objectively as possible. Smokey, juicy, spicy, vinegary, it was delicious. Spot on. Absolutely, finger-lickin’ perfect. Paired with the North Carolina style cole slaw that I made it was so… home. It felt like home.
 A pig being picked at the Rosemond Family Reunion, August 2010
Eastern North Carolina Barbeque & Coleslaw
Barbeque:
1 6-8 pound pork shoulder
Charcoal
Hickory chunks*
2 cups apple cider vinegar
1/4 cup red pepper flakes
2 tbsp salt
1 tbsp black pepper
1/4 cup olive oil
Salt, pepper, red pepper for meat prep
Heavy rubber gloves
Cole Slaw:
1 head cabbage
1 red onion
3 carrots
2 celery stalks
1/2 cup mayonaisse
1 tbsp dried mustard
1 tbsp brown mustard
Salt & pepper
2 tbsp apple cider vinegar
1 tsp red pepper flakes
Barbeque:
*If all you can find are hickory chips you can make packets of hickory in tin foil with slits cut in the bottom.
The day before you would like to smoke, soak your hickory in water.
To smoke a pork shoulder you’ll need a charcoal grill, as well as a space (like a smaller charcoal grill or a pit) to heat additional charcoal. Get started by heating 12-15 pieces of charcoal in each pile. On your main grill, you want to create a charcoal circle. It’s important that the meat not be over direct heat, so you’ll need to create a ring around the edges. Take a metal bowl, fill it halfway with water, and place that in the center.
While the charcoal is heating, rub your pork shoulder down with olive oil and sprinkle with salt, pepper, and red pepper. When your charcoal is gray, add hickory to it, place the pork in the center of the grill, over the bowl of water. Place the pork on the grill meat side down, so that the fat/skin is on top. Cover.
Now create your baste. Mix together cider, red pepper, black pepper, and salt. Stir well. Set next to the grill, covered.
Every 30 minutes, you’ll need to transfer hot coals to the grill, 5 or 6 each time. When you do this, also baste the meat. After you’ve transferred coals from your secondary station, be sure to replenish it with fresh coals. Each hour add hickory chunks to your grill. It is important to carefully monitor your coals. you want them to be gray and smoking. Too hot means your meat will overcook, too cool and you’ll be there forever.
You should factor about an hour and a half per pound of meat. About 6 hours in, it’s time to flip your meat. This is where the rubber gloves come in. Grip the meat and carefully turn it over. Add more coals, baste, cover. With a 6-7 pound shoulder you’ll be cooking for 9-10 hours. When your meat has been cooking about 9 hours, you can start testing it for signs that it is done. For one, when you grip the meat, it should give. For a more accurate test you can take it’s temperature. The ideal temperature for your pork to be, at its center, is 155-165. When it has reached this temperature, you can take it off the grill. But don’t get out the forks yet, it needs to rest!
Sit the pork in your kitchen and walk away. It needs to sit for an hour so that the juices can redistribute.
After an hour it’s time to pull the pork. To start doing this you need to remove the fat. You can simply cut off the layer of fat on the top. Next, remove the bone. The meat should be tender enough that you can simply pull it off the bone. Now your meat is in large chunks. Break each chunk down to manageable sizes (that will depend entirely on your pulling style). Use two forks to literally pull the meat apart into medium size to small chunks. Place them in a bowl. This process takes a while. It’s okay to do it in stages. As your meat is pulled, you want to add sauce. Add sauce at your desired rate. I like my pork a little wet, but not dripping. The meat will absorb a fair amount of sauce, so go slowly.
Serve with cole slaw, sweet tea, and hush puppies. This is how it’s done in Eastern North Carolina.
Cole Slaw:
Start by thinly shredding your cabbage. Next, grate your carrots on one of the smaller sides of a box grater. Thinly slice your celery and onion. Combine in a large bowl. Add red pepper, dried mustard, mayonnaise, brown mustard, and vinegar. Toss. Add salt & pepper to taste.
 My youngest brother, Ryan, inside a grill big enough to smoke a whole pig


 The process of making this pie was an… experience. We got to Durham on Thursday and had pretty steady number of photoshoots from Thursday afternoon until Saturday night. We were able to duck into the Durham Farmer’s Market Saturday morning (in between a shoot and a visit to the mall to have my glasses repaired- they fell apart, naturally) to pick up green tomatoes, but we weren’t able to make the pie until after dinner (a late, long dinner) that evening. We finally got started on the pie around 11. By 11.30 it had dawned on us that we were missing heavy cream, I had dropped a pie dish (with the graham cracker crust in it), and I was totally broken down by allergies, exhaustion, and maybe a few glasses of wine. It was a comedy of errors, everything from the crust to the caramel went wrong.

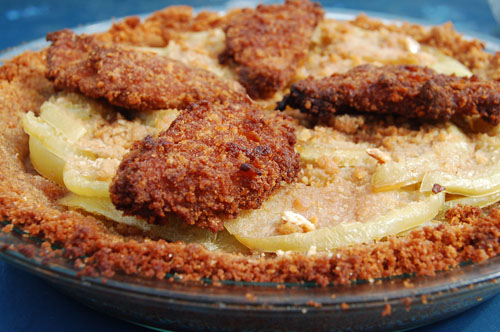
 Caramel Green Tomato Pie


