Blog - biscuits and such
southern food blog
10088
paged,page-template,page-template-blog-large-image-whole-post,page-template-blog-large-image-whole-post-php,page,page-id-10088,paged-147,page-paged-147,ajax_fade,page_not_loaded,,select-child-theme-ver-1.0.0,select-theme-ver-2.8,wpb-js-composer js-comp-ver-4.3.5,vc_responsive
 

Balsamic Fig Tarts

In 2004, I started college at the Maryland Institute College of Art.  Four years later, I graduated, moved to D.C. and started preparing for a new life. A few years after that a lot had changed but one thing had become very, very clear- I was not (nor was my husband) a D.C. person.  So we packed up everything and moved back to Baltimore, our new house literally two blocks from my college apartment.  That was in May.  It is now September and MICA has started back up in full force.  Sitting at our favorite college (and post college) haunt yesterday for lunch, watching the overly enthusiastic freshman, the jaded and bitter seniors, and my judgmental husband, I couldn’t help thinking about how MICA shaped me.

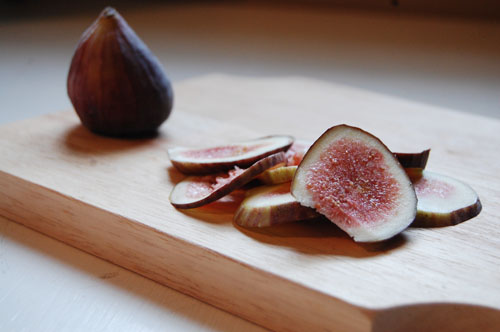
Take, for instance, this fig tart.  At one point in my life I probably wouldn’t have touched it with a ten foot pole. Later in life I may have eaten it but I wouldn’t have regarded it in any other way than how I think about burritos or a tomato sandwich (delicious but not necessarily anything to look at).  Yesterday, however, I spent hours with this fig tart.  With each step I would walk the ingredients to my bedroom (the best light on a rainy day) and position the food over and over again, tweaking here and adjusting there, the whole time basking in the glory that is the fig.  Have you every seen something quite as beautiful? Yesterday, I wasn’t sure I had.  Pink on the inside with this gorgeous texture, a lovely contrast between the center and the deep purple outside.  Mentally waxing poetic about this fruit I thought about my experience at art school.  Years of teachers and fellow students “forcing me to reconsider” whatever social issue they were creating about must have rubbed off on me.  Because yesterday, in the midst of using my B.F.A. in photography, I reconsidered a fig.  And then I ate it.

This month the world lost a wonderful soul. Our close family friend, Fred Cates, known to me as Capt’n Fred growing up, was an imaginative story teller, a fierce supporter of banana pudding, and a hell of a man.  He meant a lot to my family, and in turn, to me.  If there is a heaven, I hope he’s up there shootin’ the shit with his wife Lib and my grandparents.  Rest in peace, Capt’n.

Balsamic Fig Tarts

Pie dough (recipe here*)

1 tsp cayenne pepper

6 black mission figs

2 cups goat cheese, crumbled

2 cups balsamic vinegar

Salt

1 egg

*Pie dough substitutions: instead of 3 tbsp sugar, use 1. Also use 1 tbsp salt, and the 1 tsp cayenne pepper listed above

Start by making your balsamic vinegar reduction.  Over very, very low heat, simmer the vinegar for an hour to an hour an a half, or until it has reduced by about half.  Remove from stove and let cool.

Make your pie dough.

Roll our your pie dough into 6 4-5″ rounds.  In the center of the round, spread the balsamic vinegar, about 1 tbsp per round (it will expand in the oven).  Slice your figs and arrange the fig over the vinegar, leaving about 1 1/2″ between the figs and the edge.  Top with goat cheese and a sprinkle of salt.  Fold the edges up over the figs to form the rustic tart.

Whisk your egg until frothy.  Brush the egg over the exposed dough.

Bake at 400 for 30-35 minutes, or until golden brown.

Read More

Bacon, Arugula, & Fried Green Tomato Sandwiches

One of my favorite times of year is the end of summer/beginning of fall, for so many reasons.  The air gets crisp and fresh, the world seems like it’s starting anew.  It’s also the time of year where every fruit and vegetable seems to be in abundance.  People are leaving excess squash and tomatoes from their gardens on their neighbor’s porches, the world seems to be overflowing with life.  It is also the season of the green tomato.

At the beginning of tomato season, every ripe tomato is cherished.  They’re eaten whole, with nothing but a dash of salt.  Then the time comes, around September, when you’re hauling in baskets and baskets of tomatoes each day, when you can’t keep up.  That is the time of year when, growing up, my father would mandate a per-person number of tomatoes to be consumed.  This is also the time of year when you don’t feel so guilty picking the tomatoes green.  And it’s a beautiful time of year because (in my opinion) a green tomato is a beautiful thing.

Bacon, Arugula, & Fried Green Tomato Sandwiches

(for two)

4 slices bacon

4 slices of hearty bread

1 green tomato, medium size

1 ripe, red tomato, medium size

1/4 cup arugula

1 cup flour

1/2 cup uncooked grits

1/2 tsp cayenne

1/2 tsp garlic powder

1 tbsp salt

1 egg

Oil for frying

3 tbsp mayonnaise

1 tsp chipotle powder

Cook your bacon.  Set aside.  Heat oil in frying pan.

Slice your tomatoes.  In one bowl mix flour, grits, cayenne, garlic, and salt. In another bowl whisk the egg until smooth.

When your oil is hot, dip your sliced green tomatoes first in the flour, then in the eggs, and finally back in the flour.   Fry for 3 minutes, then flip and fry an additional 3 minutes.

Toast your bread.

Mix mayonnaise and chipotle powder.  Smear over bread slices.  Layer bacon, fried green tomatoes, red tomatoes, and arugula.  Enjoy!

Read More

Herb Infused Olive Oil

I love having a garden. For the past few years we’ve been hodge podging a garden wherever we were, growing herbs (and incubating vengeful habanero plants) on windowsills, planting tomatoes in the free space at work, always on the brink of what we really wanted.  In a lot of ways we’re still on the brink of the garden we want.  What we’re fostering these days is worlds better than our last garden, but still worlds away from our goal- our dream garden.

Our dream garden (a part of our overall dream house) will have rows and rows of garden space.  There will space for the plants to breathe, to coexist with like-minded plants.  We’ll have fruit trees, all the heirloom varieties you could think of.  There will be a place for Dan to grow hops, his own beer garden.  We’ll have bees and butterflies and probably a unicorn.  Don’t unicorns always live in these idealist scenarios?

But that’s my dream garden.  And while we’re definitely working towards it, we’re not there yet.  So I’m happy with what I have, and what I have is a thriving and happy garden.  A garden that has, despite late planting and the hottest summer on record, managed to produce a quirky array of fruit.  And since I don’t have pets or children and my husband is too sweet to complain about much, my tomatoes have given me something definitive to bitch about.

My most recent foray into both garden adventures and preservation techniques included infusing olive oil with herbs.  Drizzled over fresh tomatoes, pasta, pizza, salad, or sandwiches, an herb infused oil is a great way to add a punch of flavor to a dish.  I opted for three varieties- basil, rosemary, and oregano.  I used old whiskey bottles that I sterilized but you could easily pick up any bottle that sealed tightly, preferably with a plastic or cork lid.  Easy to make, pretty, and festive you could slap on a handmade label and voila! instant gift.  Pair it up with some homemade jam or pickles and you’re a regular Donna Reed.  Put those shoes back on!

Basil Infused Olive Oil

2 cups extra virgin olive oil

4 cups fresh basil

Sterilized bottle

To sterilize the bottle, submerge it in boiling water for at least 10 minutes.

Begin by  rinsing your basil and pressing it dry.  Combine it in a bowl with the oil.  Use an immersion blender to blend until smooth.  In a pot over medium heat, simmer the oil for 1 minute.  Pour the oil through a fine mesh strainer to remove basil clumps.  Repeat.  Use a funnel to pour the oil into the sterilized bottle.  Store in the refrigerator for up to one month.

Rosemary or Oregano Infused Olive Oil

2 cups extra virgin olive oil

10 sprigs herb

Sterilized bottle

Wash your herbs and dry.  To ensure they are dried completely place them in a low temperature oven for 2 minutes.

Place your oil in a skillet over medium heat.  Warm it, but do not let it boil.  Place your herbs in the bottle.  Pour the oil over them.  Cap and store in the refrigerator for up to a month.

**As with any preservation process, there are risks.  If you notice anything abnormal, discard the oil immediately.  Botulism is no fun.**

Read More